Mrs. Meyer’s Clean Day – Cleaners Made with Essential Oils and Plant Derived Ingredients

Getting Clean with Natural Ingredients and Essential Oils! 

Clean Day Mrs. Meyers

Having hand soaps and cleaners in the home that are not full of harsh chemicals has become something I am working towards!  I have found the Mrs. Meyers line – the cleaners made with essential oils and plant-derived ingredients! Granted some cleaners I still use but for the most part I lean towards safer products. With Clay I don’t want to worry about him touching something I just cleaned and worrying over if the cleaner will make him sick.

That is where the Mrs. Meyer’s cleaning line comes in! I have been using this line for awhile now and really love them! Their products are full of plant-derived ingredients and essential oils! They work great against fighting dirt and grime and leave your home smelling fresh and boosting your mood. I love the Lemon Verbena scent for the summer and spring! I am really wanting to try the Apple cider scent for Fall/Winter! It sounds heavenly! They have a variety of scents and products to choose from!

Mrs Meyers Cleaner

Multi-Surface Cleaner, Hand Soaps, Dryer sheets , Laundry soap and more they have you covered! I truly love the everyday cleaner, I use it for our kitchen counter-tops, bathroom, and more. I love how you can use this on all different counters and it works wonderfully! I love the crisp scent it has, it does really make the home feel fresh and clean, and puts a pep in my step! 

Aromatherapeutic Household Product 

Mrs Meyers Hand soap

Try relaxing Lavender, cool and crisp Basil, energizing Lemon Verbena or uplifting Geranium. The hand soap is really nice as well, it is a nice light scent that just helps boost your moods. It is made with olive oil and aloe vera, it doesn’t seem to dry my hands out like some soaps I have used.

BUY ME


Buying the products on Amazon is a lot cheaper for me then buying them at my local Walmart or Dillons store. Some are a few dollar cheaper on Amazon, so I am always up for saving money! They do have an awesome line that is great at getting your house clean, and not full of harsh chemicals! It is a win-win!

If you are interested, I would love for you to try it and let me know what you think of their products! 

Hurley Hippo Bath Toy Organizer – Helps Keep the Tub Clean from Toys!

Hurley Hippo Bath Toy Organizer

Good ol bath time toys, they are great but where do you store them all!? I bought this Hurley Hippo Bath Toy Organizer, and it is perfect for Clay’s toys! He is starting to get quite a few duckies, fishes that squirt water, and more. I thought it was about time we did something besides sit on the floor by the tub!

The neat thing about this bath toy organizer is, that it is a mesh style, so as the toys drain the water comes out, to help reduce mildew and mold build up. It is nice that it can hold quite a few toys in it, as I was worried about the size when I bought it! I will say the suction cups it came with did not work in our shower. They would not stay stuck, so we bought some command ones and now it is perfectly fine. I think our shower wall isn’t quite meant for their suction cups, that was a little disappointing but that is my only complaint!

Bath Toy Organizer 

Bath Toy Organizer

The mesh part where you store the toys does have quite a bit of room like I said above. I wanted to do a closer look at it, so you can see. It does have room to expand out. Granted I don’t have all of Clay’s toys in it in the picture, as he was playing with them in the living room! He is obsessed with those water toy fish! But, you can get the general idea on size. That ducky is a really large duck, and it barely takes up any space!

I hope this can help you to decide if this is a good fit for you or not!

BUY ME

 Hurley Hippo Bath Toy Organizer (Blue) The Best Net Toy Organizer Aishine Baby Kinds Bath Toy Organizer (Fox)

&

Here are a few other fun styles to choose from as well! I almost got the fox, but decided the hippo might be best with two suction cups!

Heavenly Double Chocolate Banana Muffins

Chocolate Lovers Dream with these Double Chocolate Banana Muffins

chocolate banana muffins recipe

If you are craving something that is chocolaty and will knock your socks off, try these Heavenly Double Chocolate Banana Muffins.  It’s a rainy day at my house and I have been searching the cub bards for some chocolate. As I was searching I realized that I had 3 ripe banana’s that needed tended to. So, I whipped up these amazing and Heavenly Double Chocolate Banana Muffins.

I need to back up a little and give a little history on my husband and I. Doug and I have been married for 14 years and we have a little running joke. I always buy bananas and tell him not to throw them out because I am going to make banana bread. He always laughs and says, “yeah right.” Then several days pass and I end up throwing them out without making anything banana related.  Of course, he always asks me “where is that banana bread you were going to make???”  I just laugh at him. I have made banana bread and muffins over the years, but not near as often as I purchase them and let them ripe only to toss them out! Recently, I learned you can toss your ripened bananas into the freezer and this will help me not waste them.

chocolate chip banana muffins recipe

Okay back to these delicious double chocolate muffins! Now these are very rich muffins, so you can usually get by eating just one. I like to change the recipe up here and there. They are very good if you replace the chocolate chips with peanut butter chips. You can also add walnuts or pecans to have that little bit of a crunch. I like to add applesauce to the recipe, because I love how moist it makes them. If you aren’t a fan of the applesauce you can always exchange it for the same amount of oil. (1/2 cup) Make whatever changes you like and fall in love with these Heavenly Double Chocolate Banana Muffins.

Heavenly Double Chocolate Banana Muffins

Ingredients

  • 3 medium ripened bananas
  • 3/4 cup brown sugar
  • 1/2 cup applesauce (or oil if you would rather)
  • 1 tsp vanilla
  • 1 large egg
  • 1 c. flour
  • 1/2 cup cocoa (I prefer Hershey's)
  • 1 tsp baking soda
  • 1/2 tsp salt
  • 1 1/4 cup chocolate chips Semi-sweet (reserve 1/4 cup for topping muffins)

Instructions

  1. Preheat oven to 350 degrees.
  2. Mash bananas.
  3. Mix bananas, brown sugar, applesauce, vanilla and beaten egg.
  4. In a separate bowl, mix flour, cocoa, salt and baking soda.
  5. Add the dry ingredients to the wet ingredients and mix.
  6. Add 1 cup chocolate chips.
  7. Line muffin tin with cupcake liners and fill 3/4 full.
  8. Sprinkle 1/4 cup of chocolate chips on top.
  9. Bake for 15 - 17 minutes or until toothpick comes out clean.
Schema/Recipe SEO Data Markup by Yummly Rich Recipes
https://themavensisters.com/heavenly-double-chocolate-banana-muffins/

Crockpot Rice Pudding – So Delicious and Baby Approved!


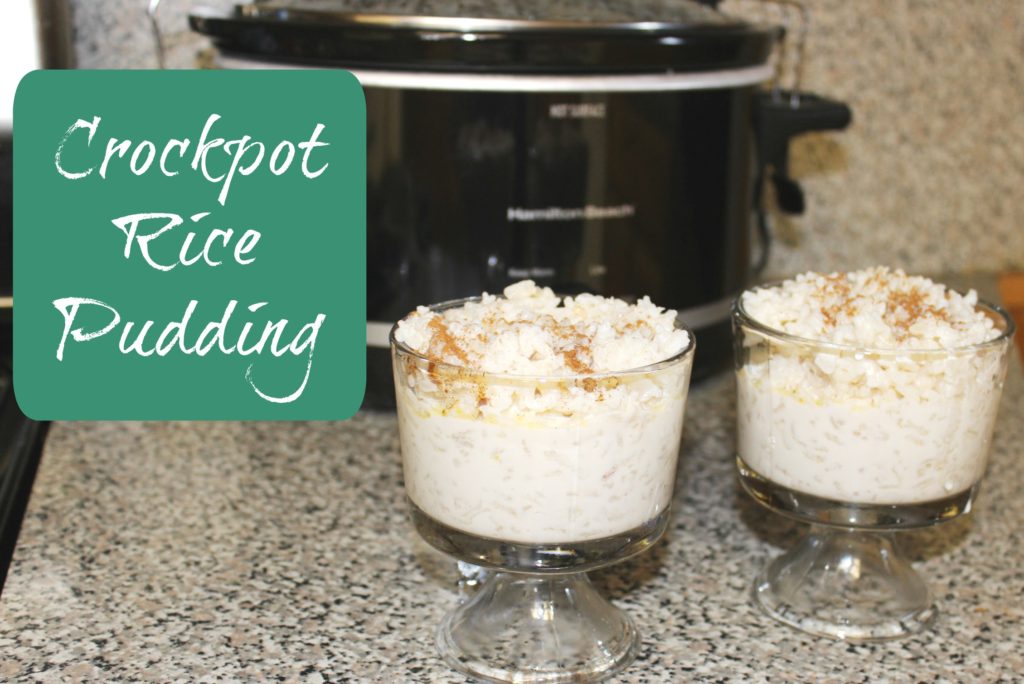
rice pudding I use my crockpot a lot, it makes life easier to toss stuff in, turn to low and leave for the day, then dinner is made for the night. But, I have began to venture out and try new recipes that are desserts like this crockpot rice pudding! It is really delicious and I love the hint of vanilla and cinnamon in it. Really hits your taste buds nicely! Growing up we ate rice and raisins a lot for breakfast, and had rice pudding here and there, it was always a treat. I wanted to make this and see what Clay thought, cause I love having memories of my past to be able to carry on to Clay!

crockpot rice pudding

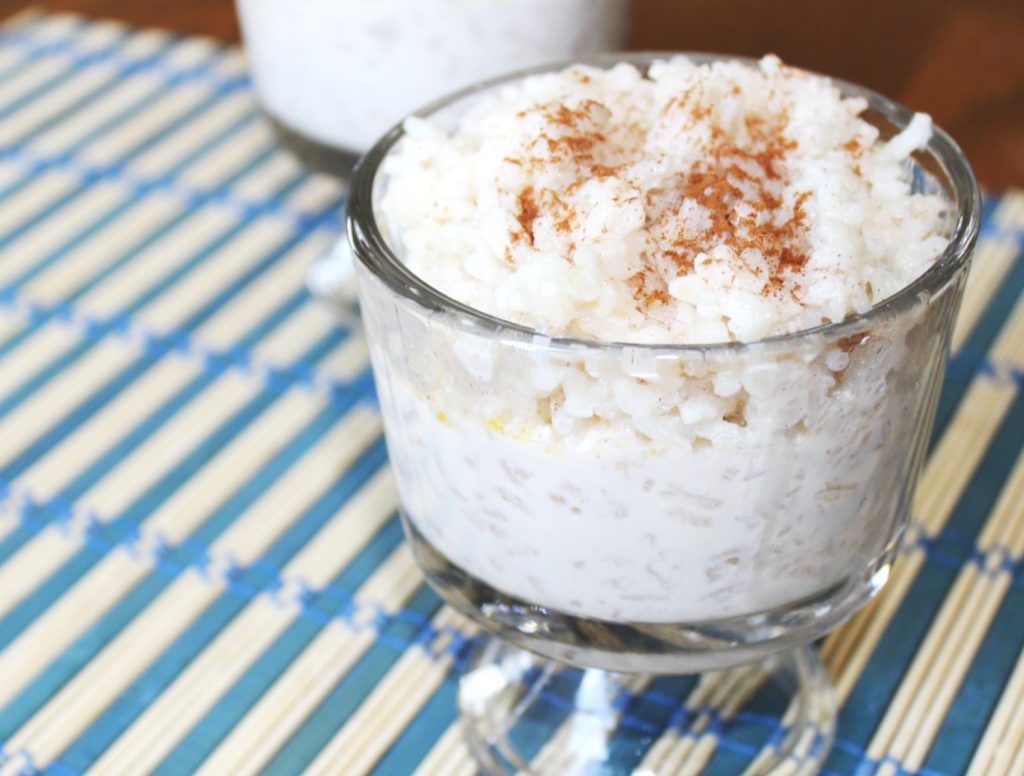
The rice pudding turned out amazing and when it was done I spooned into individual containers and served it nice and warm. I love to dust it with a little cinnamon on top, it adds a new dimension of flavor to it, and looks really pretty! This recipe is really good. Now it isn’t very creamy, it is more milky, you want that milk mixture in your bites because it is full of sweetness! I think if it were cooked in the oven, you would get that creamy flavor but crockpot cooking always changes the texture of foods, I have found. 

clay pudding

Clay found this recipe to be a winner, he actually was wanting more of it. It was a little surprising as he tends to be a little indifferent with new foods, so I take this as a win! I will for sure be making the recipe over and over through the years, it will be an easy recipe to teach Clay to do when he gets older!

Rice Pudding Recipe

Crockpot Rice Pudding

Prep Time: 10 minutes

Cook Time: 4 hours

Ingredients

  • 2 Cups Minute Rice
  • 5 Cups Milk ( I prefer whole milk)
  • 1 tbs
  • 1tsp cinnamon
  • 1/4 tsp salt
  • 1/2 cup sugar
  • 1/2 tsp vanilla extract

Instructions

  1. First off you want to take the butter and rub it around the side and bottom of the crockpot, set the leftover butter to the side.
  2. Then pour in all the ingredients except leftover butter and stir gently. Cut up the leftover butter and place on top of the mixture.
  3. Turn the crockpot to low, and let cook 3-4 hours. You will know it is ready when the rice is cooked.
  4. Serve, with a sprinkle of cinnamon if you would prefer.
Schema/Recipe SEO Data Markup by Yummly Rich Recipes
https://themavensisters.com/crockpot-rice-pudding/

So quick and easy for prep time, and it doesn’t take that long to cook. It makes your house smell amazing. I do recommend this yummy recipe to all those who love rice! I think you will enjoy the flavors and ease of making it!


Snodgrass Family First Ever 4-H Fair Experience

Pawnee County 4-H Fair

4h

This July we were fortunate enough to have our Snodgrass Family 4-H experience! We headed home on Wednesday morning from our vacation in Colorado so we could be at the fairgrounds at 8:00 a.m. on Thursday. Let’s just say that we were pretty sleepy that morning and didn’t want to wake up! We did make it to the fairgrounds by 8:00 and we had to give Kaylyn’s goat a bath. I don’t know if you have ever given a goat a bath, but it’s safe to say that it really isn’t that much fun!

Since this was our first year, we didn’t really know what to expect, but Kaylyn did an amazing job with her goat. She acted like she has been doing this forever. We were so proud of her! One of the rules is that you have to keep the goat between you and the judge at all times. It’s kind of funny, because you can tell that the judge likes to try to trick the kids up. You can tell which kids are really paying attention to the judges every move. Kaylyn was one of the kids that really watched the judge and it was so cute to see her moving around her goat.  It’s fun to see how all of the hard work of taking care of the goat finally paid off when we saw Kaylyn’s smiling face.

Additionally, because this was her first year she received a very special award. A local family donates the feed tub to first year kids in honor of a family member they lost. We are so fortunate to live in an amazing community and have so many great people here. This family is a perfect example of why we love our town!

In closing, I will say that if you have a 4-H program available for your kids that you should really consider signing up. It is a lot of work, but in the end it is totally worth it. The kids learn a lot, but the parents do to.

Chicco Liteway Plus Stroller – Perfect Stroller To Have!!!


2 in 1 Lightweight stroller and KeyFit car seat carrier

Chicco Liteway Plus Stroller

If you all are looking for an amazing stroller, look no further, here is the Chicco Liteway Plus Stroller! It is a 2-in-1 lightweight stroller and KeyFit30 Chicco Car Seat! We bought our car seat as it was the #1 rated car seat at the time of when Clay was going to be born, safety is so important. For Christmas, Adam’s parents bought us this stroller to go with it! I have to say it has been so nice to have!

We live in the country so this gets pushed through dirt, sand, grass and rocks. It does pretty good, now if the grass is pretty tall you kind of have to put some effort into pushing it, but for most terrain it does rather well for how lightweight it is. It does have smaller sized tires, so you take that into play for what you are wanting to use it for. We used it for kind of getting out and going to the zoo, ball games, walks and such. 

chicco stroller Like it says it is super lightweight and folds up very nice so you can toss in the trunk of your car and take it places with ease. You can fold the seat forward so that you can attach the car seat on, or fold it up and just have your child sitting in it. For about 5 months we used it with the car seat, as Clay was pretty small. Now he loves going without the car seat so he can see more things!

It does come with a removeable canopy that zips on and off, we use it when it is pretty sunny out! It works pretty well at getting the sun off of Clay. To switch from the car seat way to the other, it is really easy. It doesn’t take much effort which is nice! You can’t really move the canopy too much, it has a little bit of range but not an extreme amount. I always just ensure to put enough sunscreen on his legs and such, as they would sometimes not be protected very good from the canopy.

Now my orange color is no longer available, and the all the strollers are discontinued, so only available for a short time, but the positive is the price is awesome! You are saving quite a bit if you buy one now! The maximum weight limit is 50 lbs, so you can see it will last for a long time! 

 Chicco Liteway Plus Stroller, Silver Chicco Liteway Plus Stroller, Lyra Chicco – Liteway Plus Stroller – Polaris With KeyFit 30 Infant Car Seat – Polaris Chicco Keyfit 30 Infant Car Seat and Base, Lilla

&

We use this stroller a lot, the only complaint is sometimes you do have to lube up the wheels, which only takes a minute. Other than that we have been using it for almost a year and it still is great. Nothing has broke and it has worked nicely!

Family vacation

July has been a very busy month for the Snodgrass Familyfamily vacation

Towards the end of July, we went on a family vacation and had to be back in time for the 4-H fair. Talk about a busy month! We realized it had been 8 years since the last time our family took a real vacation and knew that it was time! Some friends of ours invited us to tag along to Cachura, CO and we jumped at the opportunity.

We left on Friday evening after work and headed out for our six hour drive. We decided to leave after work in hopes that Haydyn would decide to sleep along the way. Wrong! That sweet little toddler is just like her mama and can’t sleep in a vehicle! I have to say she really did a great job on the way there. We had a few things to entertain her with and she stayed pretty happy most of the way.

The only bad part about traveling to the mountains in the dark is that you can’t see how gorgeous and amazing the mountains are. We live in Kansas, so we are pretty much used to plains with very little hills. You can see for miles! So, we were rather looking forward to seeing those amazing mountains.

Once we settled into the cabin, we fell asleep with the fresh mountain breeze on our faces. When I woke up the next morning, I wiped the sleep from my eyes and looked out the window! WOW! It has been over 13 years since we visited Colorado and I forgot how breathtaking it is. The view was just gorgeous every direction I looked.

deer

We had so much fun while we were there. We went hiking, watched the hummingbirds, saw lots of deer (one was even in someone’s front yard eating), did some fishing, played mini-golf and enjoyed the views. If you have never been to Colorado, I highly recommend going. There is so much to see and just smelling the air and trees is enough to make a person want to stay forever.


Easy Homemade Taco Seasoning

Super Easy Taco Seasoning You Can Use in Lots of Recipes

I don’t know about you, but I like to save money by making my own homemade food like my Easy Homemade Taco Seasoning.  In this fast paced world we live in, it’s so easy to just live off of processed food. I am guilty of this from time to time myself. A few years ago, I decided to try to make some of my own seasonings. I was so surprised by how easy it is and how much more flavorful our food is!

Easy Homemade Taco Seasoning

My family absolutely loves any food that is mexican. We could live off of tacos and be completely content. Okay, I would still need chocolate to survive, but we could almost survive off of tacos alone! The best part of most of the mexican dishes I make is that they are inexpensive and I can use my own Homemade Taco Seasoning to save even more money. Most of the ingredients you probably already have in your cabinet, so this is an inexpensive recipe as well!

These seasoning is great because it doesn’t have all the sodium and you know exactly what goes in it. You can add it to tacos, burritos, enchiladas or any other mexican dish you can think of. It is also good if you add it to some ranch dressing for a little kick!  I would also recommend my sisters Easy Beef Enchilada Recipe!  Just add 2 heaping tablespoons and 1 cup of water to the browned hamburger and simmer for 5 minutes.

homemade taco seasonings

It’s also nice to decorate your kitchen with homemade spices and seasonings. I love the look of mason jars filled with different seasonings. It just adds that special good feeling of being in an inviting home to gather for meals. Now it’s time for you to make your own!!

Easy Homemade Taco Seasoning

Ingredients

  • 4 TBSP Chili Powder
  • 3 TBSP plus 1 TSP Paprika
  • 3 TBSP Ground Cumin
  • 1 TBSP plus 2 TSP Onion Powder
  • 1 TSP Garlic Powder
  • 1/4 TSP Cayenne Pepper (or a little more if you prefer it hotter)

Instructions

  1. Mix all ingredients together.
  2. Store in airtight container or glass jar.
  3. For use, add 2 heaping TBSP per 1 pound of meat with 1 cup water.
Schema/Recipe SEO Data Markup by Yummly Rich Recipes
https://themavensisters.com/easy-homemade-taco-seasoning/


Flooded In, New Nephew and More!

flood

It has been awhile since I have done a life post on what is new with us! About a month ago we had a few days of tons of rain back to back and we ended up getting flooded in to our home for a few days. We have a really long drive so lucky we are set up on a hill and it just flooded our road so we were a little stuck for around a day. Finally the water went down enough we were able to slowly drive through the standing water to get out! I think we got a total of around 7 inches of rain. I wouldn’t have that that rain would have caused so much overflow but it did. All the rain and running over the road for days really washed them out, so they are still a bit rough to drive down!

Lane

We also welcomed to the world our newest nephew, Lane! He truly is a doll and so cuddly! We already have 9 nieces and nephews and two who are in heaven. It is really fun to watch them all grow up and see the personalities they have. We are truly blessed!

My mom also came to visit for the weekend, Clay loved it. We don’t get to see her to often so he really enjoys it when she comes!

Life has been a bit busy around here but we are enjoying every minute of it! Hope you all have a wonderful week!

Best Beef Enchiladas That The Family Will Love!

Easy Beef Enchilada Recipe

enchiladas

These are some of the best beef enchiladas that I have created! I have tested recipes here and there and I have found that this recipe suites us the best! They are packed full of ground beef, or I like to call meaty goodness, and topped with cheese that melts to perfection! I had a craving for them so I thought why not run to the store get all the things I needed and make them up!

I am so glad I did, because they turned out perfectly! Now my husband is a huge meat lover, he kind of thinks a meal without meat isn’t really a meal! So I packed them full of ground beef, so they are pretty large in size. NOW you can make them smaller to fit your taste buds! It is all your preference. We do use the low carb style tortillas, as my husband is diabetic! We try to watch the carbs on things but still allow for a tasty meal that satisfies his cravings. Recipe does work with regular tortillas as well.

best beef enchiladas

We topped these with some cilantro and then I grabbed the sour cream, because everything taste better with sour cream in my eyes! It truly was a great meal that filled us up. You can pair this with some mexican style rice or refried beans, guacamole, or whatever else your heart desires! Top them however you like, it is a blank canvas and just fit it to your flavor palate! 

Best Beef Enchiladas That The Family Will Love!

Prep Time: 20 minutes

Cook Time: 30 minutes

Ingredients

  • 1 lb ground beef (feel free to use more ground beef if serving a lot of people!)
  • 1/2 cup finely chopped onion
  • 1 can of green chilis (4 oz)
  • Tortillas (we use low carb ones)
  • Red Enchilada sauce
  • 1 cup sharp cheddar cheese
  • salt and pepper
  • Cilantro (optional)

Instructions

  1. First off preheat your oven to 350 degrees.
  2. In a skillet you want to start browning your hamburger, salt and pepper it with a little dash.
  3. When the meat is almost cooked through with a little pink left, add in your onions and green chilis, and finish cooking.
  4. Take your enchilada sauce and pour into a bowl.
  5. Then dip a tortilla into the enchilada sauce coating it, and put into a greased pan. Add in your meat mixture, and roll up the tortilla. Then repeat till all your meat mixture is gone.
  6. Once all your enchiladas are rolled up, add your shredded cheese on top, and put in the oven to bake till it is nice and golden brown. That should take 30-40 minutes.
  7. When done feel free to chop some cilantro and toss on top, adds a fun look and new flavor to it, or skip this step!

Notes

You can double and triple this recipe. We only have 3 people in our home so I don't make huge amounts, but feel free to double the recipe if needed!

Schema/Recipe SEO Data Markup by Yummly Rich Recipes
https://themavensisters.com/best-beef-enchiladas-family-will-love/


This recipe is really easy to make and I love how quick it can come together! Adam was out mowing so it was a surprise when he came in to see what was for dinner! I am all about delicious meals that look great but don’t take a super long time to make! 

Easy Ground Beef Enchilada Recipe

easy ground beef enchilada recipe

Look at that cheesy goodness! Doesn’t it make you want to go make these like right now?! I am ready to re-heat and eat these for lunch!!