Sausage Stuffed Shells Recipe

Amazing Sausage Stuffed Jumbo Shells Recipe

Sausage Stuffed Shells Recipe

Enjoy Italian food heaven with this Sausage Stuffed Shells Recipe. You can’t go wrong with this delicious recipe. The spices and sauce blend well and leave you begging for more.

Lasagna is a favorite in our household, but sometimes we want something a little different. Once we were invited to some friends house for dinner and the hostess served us Sausage Stuffed Shells. I immediately fell in love at the very first bite. The sausage just takes the pasta dish to a whole new level. My mouth is watering, just thinking about it!

Stuffed Jumbo Pasta Shells Recipe

The Sausage Stuffed Shells Recipe has become a staple in our home. We make sure to keep it in our rotation of regular meals.


Make the Sausage Stuffed Shells Recipe as a Freezer Meal

Finding freezer meals that actually taste good can sometimes be difficult.  I recommend if you plan to use it as a freezer meal, to make sure and thaw it properly or it will take forever to cook.  I made the mistake of taking out of the freezer at lunch and trying to cook it for supper and it was sort of a disaster!  Best case scenario is to place it in the fridge the night before you plan to bake it.

It is a great meal gift! The Sausage Stuffed Shells are also a wonderful meal for someone who just had a baby, a college kid or someone who had a death in the family recently.  They can eat it right way or toss it in the freezer for an easy meal later on. Plus, this meal is a little different that the normal casseroles and regular lasagna’s people normally give. People love this meal, so except lots of compliments and people asking for the recipe.

italian stuffed shells recipe

The thing I love the most about this Sausage Stuffed Shells Recipe (besides the sausage) is the cheese! I love the cottage cheese with the mozzarella and the Parmesan all together. Cheese is literally one of my favorite foods ever. With this recipe, there is plenty of that gooey and delicious cheese to go around.

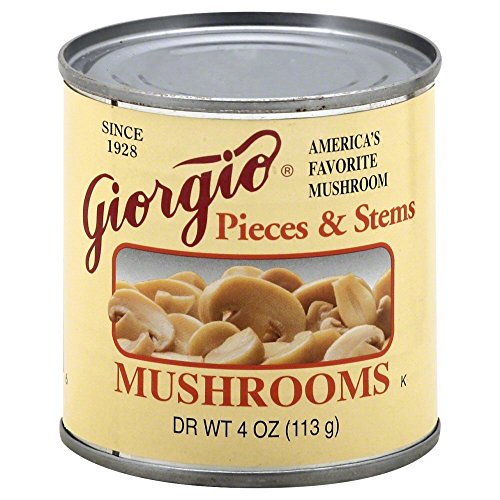
You can really personalize these by adding or omitting any of the ingredients. You could add other kinds of cheese, mushrooms, black olives or even diced tomatoes. The options are endless!

Sausage Stuffed Shells Recipe

Ingredients

  • 20 - 25 Jumbo Pasta Shells
  • 1 tbsp salted butter
  • 1 1/2 lbs. sausage
  • 2 tablespoons chopped onion
  • 1 - 2 cloves of garlic
  • 1 (12 oz.) can of tomato paste
  • 1 (14 oz.) can of tomato sauce
  • 1/2 teaspoon garlic powder
  • 1/2 tsp. oregano
  • 2 eggs
  • 3 cups cottage cheese
  • 1 (16 oz.) package of mozzarella cheese
  • 1/2 cup Parmesan cheese
  • 2 tbsp dried parsley
  • 1 tsp salt
  • 1/2 tsp cracked pepper

Instructions

  1. Preheat oven to 375 degrees F.
  2. Boil pasta in large pot with water and add salted butter (to prevent sticking). Cook for 5-7 minutes. You want pasta to remain slightly firm and not mushy.
  3. Brown sausage, onions and garlic cloves. Drain meat.
  4. Add tomato sauce, tomato paste, salt, oregano and garlic powder. Simmer for 5 - 7 minutes.
  5. Beat eggs in mixing bowl.
  6. Add cottage cheese, 3/4 of the mozzarella, parmesan cheese, parsley, salt and pepper.
  7. Once shells have finished cooking, add spoonfuls of the cheese mixture to shells.
  8. Place them in 9 x 13 pan.
  9. Pour sausage mixture over the top and bake for 25 - 35 minutes.
Schema/Recipe SEO Data Markup by Yummly Rich Recipes
https://themavensisters.com/sausage-stuffed-shells-recipe/

Give These Other Recipes a Try Too!

Stuffed Shells with Ground Beef

Crockpot No Bake Cookies


Easy Beef Tips and Gravy Recipe In the Oven!

Easy Beef Tips and Gravy Recipe In the Oven!


No Peek Easy Beef Tips and Gravy – Mouthwatering Good! 

Easy Beef Tips and Gravy Recipe

If you are looking for an easy beef tips and gravy recipe, look no further! You have come to the right place, have I got a recipe for you that is quick, easy, and delicious! Three of my most favorite things! When the weather gets colder like we have been having on and off, I love to make nice and hearty meals that sticks to your ribs a little bit! Adam works out in the oil field so if it is cold all day, I want him to come home to a hearty and warm meal!

The weather here is on and off, one day it is warmer and the next it is cold. So on the cold days I take advantage of meals like this for him! Cooler days I always whip up lighter meals like a shrimp spring bowl!

Beef Tips and Gravy

This is a NO PEEK recipe, so once it goes in the oven, you just trust it is doing the right thing! You wrap the pan in aluminum foil and you don’t want to peek because all the steam will escape, and you need that to help keep your meat nice and tender!!

We chose to pair this with mashed potatoes, but you can do egg noodles or even rice! I just prefer potatoes, but every now and again I will do egg noodles. I am not the biggest fan of rice, so I never do that.

McCormick Brown Gravy MixMcCormick Brown Gravy MixLipton Recipe Secrets Soup MixLipton Recipe Secrets Soup MixCream of Mushroom SoupCream of Mushroom SoupGiorgio Mushrooms, Pieces N StemsGiorgio Mushrooms, Pieces N StemsAnchor Hocking 3-Quart Glass Baking Dish with Green TrueFit LidAnchor Hocking 3-Quart Glass Baking Dish with Green TrueFit LidReynolds Wrap Aluminum FoilReynolds Wrap Aluminum Foil


Easy Beef Tips Recipe In the Oven

Ingredients:

2 lb cubed beef stew meat
1 envelope brown gravy mix
1 envelope onion soup mix
1 can cream of mushroom soup
1 small can of mushrooms (4 oz optional!)
1 cup Ginger ale or water

No Peek Beef Tips

Instructions:

First off you want to Preheat the oven to 300 degrees. Spray your 9×13 pan with cooking spray and then put the beef in. Layer it on the bottom of pan.
Then in a bowl mix up your Ginger Ale, mushroom soup, onion soup and brown gravy. If you opted for mushrooms add those in as well.
Pour the mixture over the meat. And wrap TIGHTLY in aluminum foil.
Bake for 3 hours and NO PEEKING!
Serve with your favorite sides and enjoy!

See simple and easy and yet so satisfying! I hope you enjoy this delicious recipe, I know we do. I don’t make it a ton, not sure why because it is so simple to do!

Stay tuned for more recipes and reviews to come! Happy Sunday everyone!

Easy Beef Tips And Gravy Recipe

Ingredients

  • 2 lb cubed beef stew meat
  • 1 envelope brown gravy mix
  • 1 envelope onion soup mix
  • 1 can cream of mushroom soup
  • 1 small can of mushrooms (4 oz optional!)
  • 1 cup Ginger ale or water

Instructions

  1. First off you want to Preheat the oven to 300 degrees. Spray your 9x13 pan with cooking spray and then put the beef in. Layer it on the bottom of pan.
  2. Then in a bowl mix up your Ginger Ale, mushroom soup, onion soup and brown gravy. If you opted for mushrooms add those in as well.
  3. Pour the mixture over the meat. And wrap TIGHTLY in aluminum foil.
  4. Bake for 3 hours and NO PEEKING!
  5. Serve with your favorite sides and enjoy!
Schema/Recipe SEO Data Markup by Yummly Rich Recipes
https://themavensisters.com/easy-beef-tips-gravy-recipe/

If you are looking for an easy beef tips and gravy recipe, look no further! You have come to the right place! Perfect for a weeknight dinner.

Easy Slow Cooker Ribs

Enjoy These Fall Off The Bone Easy Slow Cooker Ribs

Easy Slow Cooker Ribs

There is nothing more delicious than these Easy Slow Cooker Ribs. They literally fall off the bone, melt in your mouth and provide an explosion of tangy flavors! You can’t go wrong with these Easy Slow Cooker Ribs. They are crowd pleasing, husband pleasing and kid pleasing.

The key to this recipe is that there are no wet ingredients. Simply make a dry rub and put the ribs and place them in the slow cooker standing up. The juice from the ribs will provide the moisture that is needed to make mouth watering ribs. After they are done in the slow cooker, add whatever sauce you prefer then broil them for a few minutes or toss them on the grill for that caramelized sauce flavor.

Don’t Forget to Remove The Membrane

When my husband and I first got married, I tried several times to make ribs with no success. They always were too chewy and I just couldn’t even bite through them. Well, I wasn’t removing the membrane on the back side of the ribs. It’s a gross job, but if you want amazing ribs you just have to do it. I was going to take several photos of my husband removing the membrane on these ribs, but his big arms kind of took over the photos so you can’t see much. In this photo below you can see that pink fleshy layer and that is the membrane. Try to peel it up a little with a knife or push your finger under it to loosen. Then you just peel away. You may get lucky and it will peel in several big pieces or you may have some stubborn stuff that only comes on in small pieces. Either way, don’t give up until it’s gone.

Easy Crock Pot Ribs

Okay, now that we got that little lesson out of the way we can talk more about those mouth watering Easy Slow Cooker Ribs! There may be different seasonings that you prefer. Don’t hesitate to try out different flavors. I always use Sweet Baby Ray’s sauce, but if you prefer something else then give that a try. Play with the recipe, make it your own. Pair it with this Creamy Coleslaw  or this Bacon Bowtie Pasta Salad and you will have a heavenly meal!


easy bbq ribs recipe

The best part about these ribs is that they don’t have to during the summer only. They would make a great addition to your winter meals when you already have out your slow cooker.  Hope your family enjoys these Easy Slow Cooker Ribs as much as mine does.


Easy Slow Cooker Ribs

Ingredients

  • 1/4 cup brown sugar
  • 2 TBSP smoked paprika
  • 1 tsp onion powder
  • 1/2 tsp garlic powder
  • 1/4 tsp cayenne pepper
  • 1 1/2 tsp salt
  • 1 1/2 tsp cracked pepper
  • 2 racks of pork ribs (membrane removed)
  • 1/2 cup of Sweet Baby Ray's BBQ sauce

Instructions

  1. Mix all dry ingredients.
  2. Rub both sides of ribs with dry mixture.
  3. Place in slow cooker and try to stand ribs up and lean against the side of slow cooker.
  4. Cook on low 6-8 hours.
  5. Remove ribs carefully.
  6. Brush with Barbecue sauce.
  7. Place on baking sheet and broil for 4-5 minutes. Or finish cooking on the grill for 10 minutes.
Schema/Recipe SEO Data Markup by Yummly Rich Recipes
https://themavensisters.com/easy-slow-cooker-ribs/

Fresh Cucumber Salsa

Delicious Homemade Cucumber Salsa

fresh cucumber salsa

If you are looking for something to make with all those cucumbers and tomatoes from your garden, make this amazing Fresh Cucumber Salsa. Our daycare provider sent home an entire bag of fresh cucumbers and we had no idea what we were going to do with that many! Our garden is really producing a ton of ripe red tomatoes, so I thought it’s the perfect time of year for some Fresh Cucumber Salsa.

Even kids like this Fresh Cucumber Salsa! At least mine do anyway.  As I was taking photos, Haydyn kept taking chips and reaching into the dip! It was really funny and I just happened to capture her little hand reaching in for some of that delicious Cucumber Salsa.

cucumber salsa recipe

The recipe I use doesn’t call for fresh tomatoes, but we love them so much with it that we used them in place of a 2nd can of Rotel tomatoes. Our household isn’t a fan of cilantro, so I didn’t add it either. You can make little adjustments to perfect the recipe to your tastes. I think some fresh onions would go nicely in this recipe as well.

This Fresh Cucumber Salsa has just enough of a little kick to it, but you could always make it spicier if you prefer. Just use Hot Rotel Tomatoes instead of Original.  My husband and I tend to disagree on how spicy some of our foods should be! He wants it to burn your nose hairs and I am much more conservative. Play with the flavors and see what works best for you.

Fresh Cucumber Salsa

Ingredients

  • 3 cucumbers diced and without skins
  • 1 can Rotel Original (if you don't want to add fresh tomatoes use 2 cans of rotel.)
  • 1 1/2 cups of fresh tomatoes
  • 2 packets of dry ranch dressing
  • 3 tbsp of apple cider vinegar

Instructions

  1. Mix together cucumbers, rotel, tomatoes, dry ranch dressing and apple cider vinegar. Serve immediately or refrigerate for a couple of hours. Serve with tortilla chips.
Schema/Recipe SEO Data Markup by Yummly Rich Recipes
https://themavensisters.com/fresh-cucumber-salsa/

I hope you love Fresh Cucumber Salsa as much as everyone in our house does. It would be a wonderful addition to fall parties, football food or those last barbecue’s of the season.

tomato cucumber salsa recipe

Caramel Apple Cream Cheese Dip – No BAKE!

Fall is in the Air at My House with this Caramel Cream Cheese Dip
Caramel Apple Cream Cheese Dip

Fall is upon us with this nice cool weather we keep having on and off, it is getting me in the mood for pumpkin cream cheese muffins and Caramel Apple everything! I made this delicious Caramel Apple Cream Cheese Dip the other day, and let me say it is heaven with each dip! I shouldn’t have made it, because I wanted to eat the whole thing it was that good!

For this dip I used a salted caramel, and it really paired nicely with the cream cheese. Dip your apple or other fruits you want and just dig in to the creamy goodness! I truly love this dip, and it would be great for any season, I just think it is perfect for Fall gatherings!

Caramel Dip

I am in full fledge prep mode for Clay’s Birthday coming up! We went outside and had a photo shoot for his invitations I will be creating here, and getting in the mail soon! We have a lot of decorations bought, I just can’t wait! It will be a perfect day I am sure! When we came in from pictures, I thought to make this dip as a snack for us. Clay really loved the cream cheese part of it, and much on the apples some!

Caramel Apple Cream Cheese Dip – Perfect for FALL

Ingredients

  • 1 block of cream cheese
  • 1 jar of caramel sauce I used Salted Caramel (you can make homemade sauce)
  • Apples or other fruit

Instructions

  1. Take your block of cream cheese and let it get to room temperature.
  2. With a spoon drizzle some of the caramel sauce over the cream cheese until you reach as much as you want on the block.
  3. Cut up your fruit or cookies and dip or spread to enjoy!
  4. Refrigerate after you are done eating on it, if you have any left!!
Schema/Recipe SEO Data Markup by Yummly Rich Recipes
https://themavensisters.com/caramel-apple-cream-cheese-dip-no-bake/

Caramel Apple Dip

Okay so this recipe, kind of isn’t a full fledge recipe, as it is so easy! BUT I had to share it in case you had never tried this! I know it is fabulous and so easy to whip up, that everyone will love it to pieces!

Easy Homemade Peach Cobbler

The Best Peach Cobbler Ever

easy homemade peach cobbler

As far as desserts are concerned, there is nothing better than fresh Easy Homemade Peach Cobbler. Top it with some ice cream and you can’t help but moan when you bite into it. This is by far my favorite Homemade Peach Cobbler recipe. It’s been keeping my family happy for years.

With fall on the horizon, fresh peaches and other fruits are making their appearance in our town. Our community did a fundraiser and had a bunch of cases of peaches sent in to sell. When I heard there were going to be fresh peaches, I almost did a back flip! We don’t usually get really good peaches in our grocery store, so when they are brought to town it’s something to get excited about.

This recipe calls for fresh peaches. You could certainly use frozen ones if that is all you have available, but I promise it won’t be as tasty.  Making it with frozen peach is still going to be a lot better than not making it at all! No matter what you use you will love this Easy Homemade Peach Cobbler.

best peach cobbler recipe

How to Blanch Peaches

In case you have never blanched peaches, I thought I better give you some instructions in case you are just starting out. I used to freak out just hearing the word “blanching.”  I figured it was some long and drawn process, but it is really easy. First get out a big pot and boil some water. I like to cut an “X” on the bottom of the peach, just enough to break the skin. Then put your peaches in the boiling water. Let them boil for 1 – 2 minutes. After you are done boiling, drop the peaches in a large bowl filled with ice water. I let them sit for around 45 seconds to a minute then I start pealing the skins off. You will be surprised by how easy the skin just falls off.  You can also use this method to blanch other fruits and vegetables.

Easy Homemade Peach Cobbler

Ingredients

  • 8 fresh peaches - skin removed and sliced into 1-2 inch pieces depending on your preference
  • 1/4 cup white sugar
  • 1/4 cup brown sugar
  • 3/4 teaspoon cinnamon
  • 2 teaspoons cornstarch
  • 1 teaspoon lemon juice (fresh or concentrate)
  • Topping Ingredients
  • 1 cup all-purpose flour
  • 1/4 cup white sugar
  • 1/4 cup brown sugar
  • 3/4 teaspoon baking powder
  • 1/2 teaspoon salt
  • 6 tablespoons unsalted butter
  • 1/4 cup boiling water (I use the water that I blanched the peaches with)

Instructions

  1. Preheat Oven to 425 degrees
  2. Mix peaches, 1/4 cup sugar, 1/4 cup brown sugar, 3/4 teaspoon cinnamon, cornstarch and lemon juice.
  3. Bake peaches for 10 minutes.
  4. Cut up your butter into small chunks.
  5. Mix all topping ingredients. I use my fingers to blend it together and make a crumbly topping.
  6. Remove peaches from oven and sprinkle crumble topping all over peaches. I like to sprinkle a little extra cinnamon on and sugar on the very top.
  7. Bake for 30 minutes or until the top is golden.
Schema/Recipe SEO Data Markup by Yummly Rich Recipes
https://themavensisters.com/easy-homemade-peach-cobbler/

I hope your family falls in love with this peach cobbler like ours has. It’s a great go to recipe for family functions and events too. Once it’s gone you will always be wanting more! Happy Baking!

Stuffed Shells with Ground Beef and Spinach Recipe

Stuffed Shells with Ground BeefStuffed Shells with Ground Beef is always something that is a crowd pleaser in our home! I try to add a little healthy to it by adding in some spinach! It is a great way to get some of your greens and still enjoy a very hearty meal! Adam is a huge meat lover so I can’t have a meal without some meat! I love to add ground hamburger to this, but you can also substitute with turkey or even sausage! Both will still go really well with the meal!

Now these are a little bit time consuming as you have to stuff each shell, but it is worth it in the end! I get tired of the basic spaghetti or lasagna, and want to switch it up at times! When I am feeling fearless I dive into making these stuffed shells with ground beef and spinach! 

Ground Beef and Spinach Stuffed Shells

stuffed shells with spinach

I love to use cottage cheese in my recipe, but you are welcome to use ricotta cheese, it is totally whatever you prefer taste wise! We grew up with cottage cheese in our pasta’s so I prefer that. As for pasta sauce, you can use homemade or just grab a jar of your favorite one. Right now we are using the Ragu Mushroom, it is my go to! I need to get on making up my own, and then freezing it to have on hand!

Stuffed Shells with Ground Beef and Spinach Recipe

Ingredients

  • 1 lb ground beef
  • 1 - 24 oz cottage cheese
  • 1 - 16 oz box of jumbo shells
  • 1 large jars of spaghetti sauce
  • 2 eggs lightly beaten
  • 1/2 cup shredded spinach (can use fresh but I use frozen)
  • 2 cups mozzarella cheese
  • 1 cup parmesan cheese

Instructions

  1. First off preheat oven to 350 degrees. Cook pasta shells as directed on the box. Put hamburger and cook it up, ground.
  2. In a 9x15 pan add about 1/2 the pasta sauce to the bottom of the pan and set aside.
  3. While that is cooking mix your eggs, cottage cheese, shredded spinach and 1 cup mozzarella cheese and 1/2 cup parmesan.
  4. Once your hamburger gets done you will add in the ground beef and mix well.
  5. Drain pasta when done cooking and let cool a little, once able to handle without burning yourself, start to stuff the shells with the mixture.
  6. Once all your shells are stuffed and in the pan you can then add the rest of the jar of sauce all over pasta. Top with the remaining shredded mozzerella and parmesan cheese.
  7. Cover with aluminum foil and bake for 30 minutes, then remove foil and bake an additional 15 minutes.
  8. Serve and enjoy.

Notes

I had leftover noodles, I went ahead and filled them and put them in an 8x8 dish for another meal. You can either serve it up then, or assemble and then just freeze for a meal later on. Don't cook in the oven if you will freeze, just do all the steps like you would bake it then wrap it up and store in freezer.

Schema/Recipe SEO Data Markup by Yummly Rich Recipes
https://themavensisters.com/stuffed-shells-ground-beef-spinach/

The steps do take a little time, but really it is pretty easy to make. It is a nice change for sure from the basic pasta and sauce recipes we have do regularly! I hope you all enjoy this recipe, and make sure to check out some other ones we have.

Other Tasty Recipes to Try Out: 

best beef enchiladas

easy slow cooker meatballs


Easy Crowd Pleasing Party Mix

Keep Your Guests Happy With this 3 Ingredient Party Mix

Candy Corn Snack Mix

Never disappoint with this Easy Crowd Pleasing Party Mix! There are only 3 ingredients and you are sure to keep your guests happy and coming back for more.  Many years ago, during my days of working at Farm Bureau, my mentor would bring in this Easy Crowd Pleasing Party Mix as a special treat. We would always grab little paper cups and fill them with this delicious mix and eat until we were miserable! I loved every minute of it!

Now that my Farm Bureau days are long gone, I didn’t want this Easy Crowd Pleasing Party Mix to be gone too. So, every once in a while I make this special treat for my family. I can’t make it very often because we have no self control when it comes to it. As I am typing this I am literally thinking about getting my next helping!

Easy Halloween Food Party Ideas

This Easy Crowd Pleasing Party Mix is great for office, school or daycare parties. Assuming you are allowed to bring products with peanuts in them. If not, you can always omit the peanuts and replace them with something else you prefer. One of the great things about this mix is that you can make so many different variations of it. Some things I recommend adding are: marshmallows, chocolate chips, pretzels, chocolate covered pretzels, peanut M&M’s, peanut butter M&M’s, peanut butter chips, candy pumpkins, cashews, almonds, popcorn or really anything else you can think of. You can’t go wrong with customizing it to your tastes.

Easy Crowd Pleasing Party Mix

Ingredients

  • Bag of M&M candies (16 oz)
  • Jar of Dry Roasted Peanuts (16 oz)
  • 2 Bags of Candy Corn (6 oz)

Instructions

  1. Mix all ingredients in plastic container with a lid. Store in airtight container.
Schema/Recipe SEO Data Markup by Yummly Rich Recipes
https://themavensisters.com/easy-crowd-pleasing-party-mix/

Hope you enjoy making this easy mix and can adjust it to your liking. Your friends and family will be begging you for more, I promise!

Bacon Bowtie Pasta Salad Recipe – Crowd Pleasing Delicious!

Pasta Salad Lovers- Try this Bacon Bowtie Pasta Salad today! 

bacon bowtie pasta salad

Pasta salads are a hit in our house, my husband just loves them! So I try to mix it up and do different flavor combos in our salads. This is a really tasty bacon bowtie pasta salad, and it has tomatoes and onions in it!  His all time favorite is the Italian Pasta Salad, it is my go to salad.  This salad has a whole new flavor combo to please your palate! 

This bacon bowtie pasta salad has a nice crunch of bacon, tomatoes and a tangy sauce! I like to serve this with some garlic bread, it really pairs nicely I think. We love bacon in our house, so if it has bacon it will most likely get ate.

 Corelle Livingware Fun Packs 5 Pieces Winter Frost White April Cornell Blue and White Napkins, Set of 4

&

If you are interested, here are the classic white bowls, that can be used to serve out of, similar to these! They are fun, and I love the crisp white of them, it really just makes the pasta salad pop! It lets the pasta be the star, and that is what I love! The napkins I have pictured above are very similar, if you are interested in them as well!

Bowtie Pasta Salad – Great for PotLucks! 

bowtie pasta salad

Bacon Bowtie Pasta Salad Recipe – Crowd Pleasing Delicious!

Ingredients

  • 1 16-ounce box bowtie pasta
  • 1 16-ounce package of bacon
  • 1 large tomato, diced (appx. one cup)
  • 2 green onions, finely sliced
  • 1 cup mayonnaise
  • 1 teaspoon milk
  • 1 tablespoon red wine vinegar
  • salt and pepper to taste

Instructions

  1. Cook pasta according to package directions, rinse in cool water and drain well. Set aside.
  2. Chop the bacon in small pieces and brown it in a large skillet. When the bacon is crisp, drain on paper towels and allow to cool.
  3. In a large bowl, combine the pasta, bacon, tomatoes, mayonnaise, green onion, vinegar, and milk. Mix thoroughly to combine. Reserve a few of the green onions for garnish, if desired.
  4. Taste and add salt and pepper to taste. At this point you can also add more mayonnaise and/or vinegar to your liking.
  5. Serve immediately or cover and allow to chill in the refrigerator.

Notes

As it sits in the refrigerator, it may absorb some of the dressing, so you may need to add more mayonnaise and/or vinegar before serving.

Schema/Recipe SEO Data Markup by Yummly Rich Recipes
https://themavensisters.com/bacon-bowtie-pasta-salad-recipe/

This recipe really is pretty easy to whip up, I love the ease of it. The vinegar and mayo dressing has a nice tangy flavor to it, which is paired nicely with tomatoes and bacon. Plus you can never go wrong with bowtie pasta, it is so pretty and really adds a fun style to salads. If you don’t like green onions you can always leave them out, that is no problem. The green just adds a pretty garnish look.

Enjoy!

Pumpkin And Cream Cheese Swirl Muffins Recipe – Melts in your mouth

Try These To Die For Pumpkin and Cream Cheese Swirl Muffins

Pumpkin Muffins with Cream Cheese One thing I know is Fall couldn’t come fast enough for me! I finally decided it is close enough to September to whip out some pumpkin recipes! I am head over heels in love with these pumpkin and cream cheese swirl muffins! Y’all, if you love pumpkin and cream cheese, then you will love these beauties!

Pumpkin and cream cheese are like a match made in heaven, and I just had to get a little pumpkin fix! Granted pumpkin doesn’t have to be narrowed down to one season, so today is the day! I had a can of pumpkin puree staring at me, and these beauties are what I created!

pumpkin muffins with a cream cheese swirl

What I love about these muffins is the light pumpkin flavor they have, and then the little bit of cream cheese swirl on top really adds a whole new creamy texture to the muffins! They are so moist, I truly love these pumpkin muffins! What I did was bake them all up, allow them to cool completely then I tossed them all in the freezer! That way I can grab and zap in the microwave for morning time, and they take like new! They freeze and reheat beautifully! Now if you don’t want to freeze them just store in a air tight container in the fridge!

 KitchenAid 4.5-Quart Classic Series Stand Mixer, Onyx Black

&

I use my KitchenAid Mixer when I make these, and then when I go to do the cream cheese mixture I rinse out my bowl and then use it It really makes the whole process so much easier, and we all know I don’t have a ton of time!!

Pumpkin Muffins with A Swirl of Cream Cheese 

pumpkin muffins with cream cheese

So enough chatter from me, lets get on to the recipe! They are pretty easy to make just do your pumpkin batter then a separate bowl for your cream cheese batter, and pour and bake!

Pumpkin And Cream Cheese Swirl Muffins Recipe – Melts in your mouth

Ingredients

  • FOR MUFFINS:
  • 1 Can of pumpkin puree 15 ounce
  • 1 cup sugar
  • 1/2 cup packed brown sugar
  • 2 eggs
  • 1/2 cup canola oil
  • 2 tablespoons vanilla extract
  • 1 3/4 cup flour
  • 2 tablespoons pumpkin spice
  • 1 teaspoon baking soda
  • 1/2 teaspoon salt
  • Filling:
  • 8 oz cream cheese (room temperature)
  • 1/4 cup granulated sugar
  • 1 large egg yolk
  • 2 teaspoons vanilla extract

Instructions

  1. First off preheat your oven to 375 degrees. While it is warming up, take your flour, baking soda, pumpkin spice, and salt and mix in a little bowl and set aside.
  2. In a KitchenAid Mixer or bowl if you don't have mixer, mix the brown sugar, granulated sugar, oil, eggs, and vanilla together.
  3. Once well mixed, slowly add the dry ingredients in until well mixed.
  4. Spoon out your pumpkin batter into muffin tins. Fill about 3/4 full.
  5. In a separate bowl mix your filling ingredients until fluffy.
  6. Then add a dollop on each muffin, and grab a toothpick and swirl it around. It will make the muffins look pretty when they are baked!
  7. Bake for 18-23 minutes. Mine took right at 18 but depending on where you live the cook time can vary.
  8. Enjoy, if you don't eat them right away store in a air tight container in the fridge.
Schema/Recipe SEO Data Markup by Yummly Rich Recipes
https://themavensisters.com/pumpkin-cream-cheese-swirl-muffins-recipe/

These muffins are a crowd pleaser for sure! I know we will be making more of these to have on hand! Clay absolutely loves them! I am all about baking and freezing goodies for the ease of it!


What is your favorite pumpkin recipe?